


How to use SwissDock
Welcome to the documentation page of SwissDock. Here, you will find explanations and annotated images of the SwissDock input and results pages. This documentation uses Attracting Cavities as an example, but all concepts apply also to AutoDock Vina.
To do a docking with SwissDock you first need to choose the algorithm. Two options are available: Attracting Cavities 2.0 (AC) or AutoDock Vina (Vina). Then you need to 1) submit a ligand, 2) submit a target, 3) define a search space, 4) select your parameters, and 5) start the docking.
Input
Choose a docking method
You can choose the docking algorithm by clicking on the tab corresponding to the one you want to use. You can also use one of the three examples by clicking on the corresponding bold text. This will fill the form with the desired ligand, target, and search space.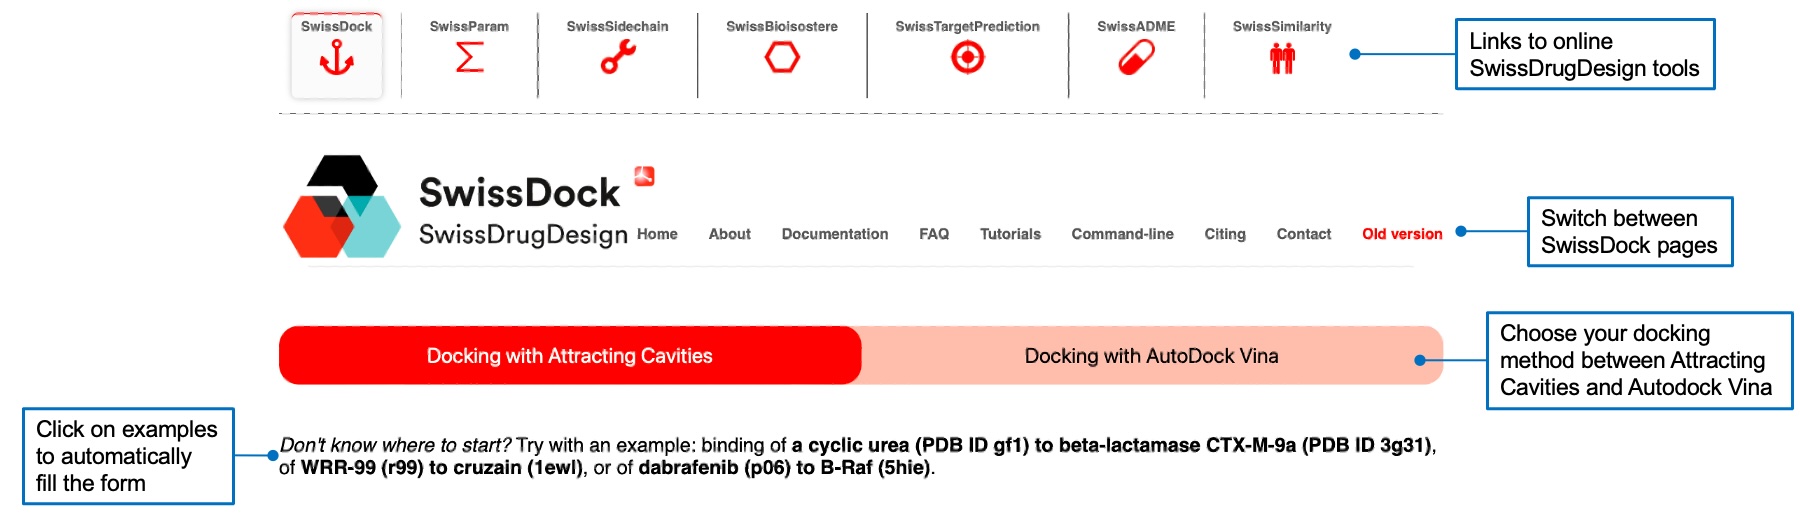
1 - Submit a ligand
You can submit a ligand in several ways, by writing a SMILES, uploading a Mol2 file (and a PDBQT file for Vina), using the sketcher, or using the advanced search link. Multiple file formats can be imported via the sketcher. Your molecule will appear in the text box in SMILES notation and will be drawn in the molecular sketcher. Once you selected a ligand, the "Prepare ligand" button will be red and active. A check mark will appear next to the button if the preparation was successful.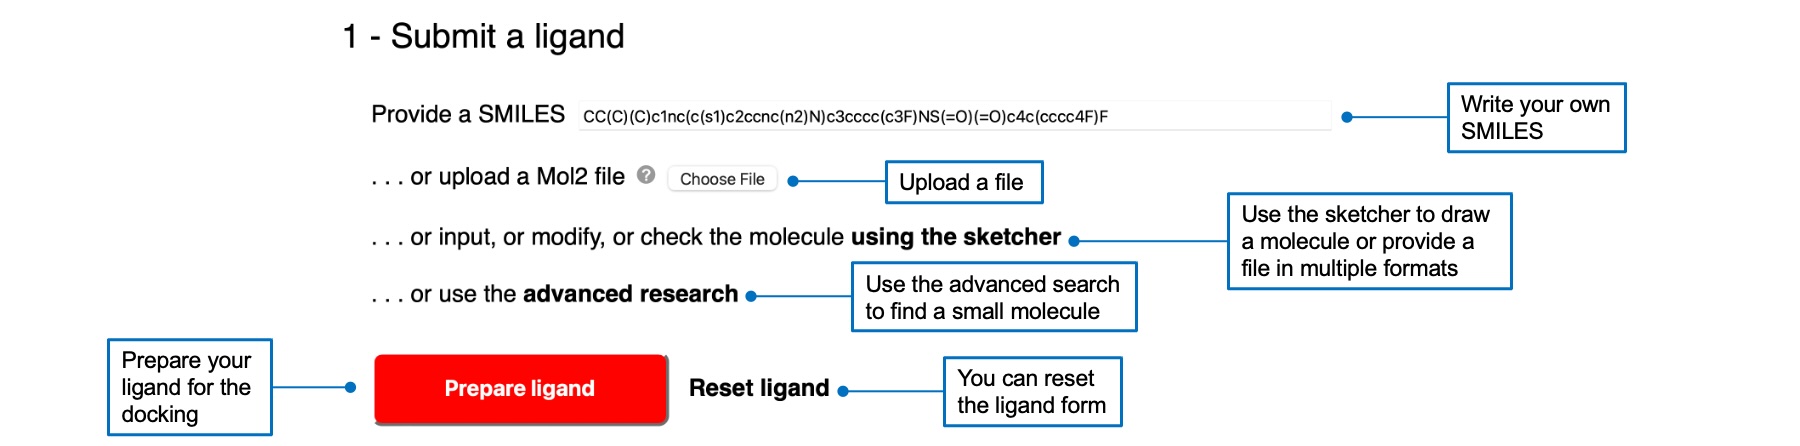
2 - Submit a target
You can submit a target by writing a PDB ID, uploading a PDB file (and a PDBQT file for Vina), or using the advanced search link. Your target will appear in the 3D viewer below. If you select a PDB ID or used the advanced search, you will have to select chain(s) and heteroatom(s) to keep for the docking. Once you selected a target, the "Prepare target" button will be red and active. A check mark will appear next to the button if the preparation was successful.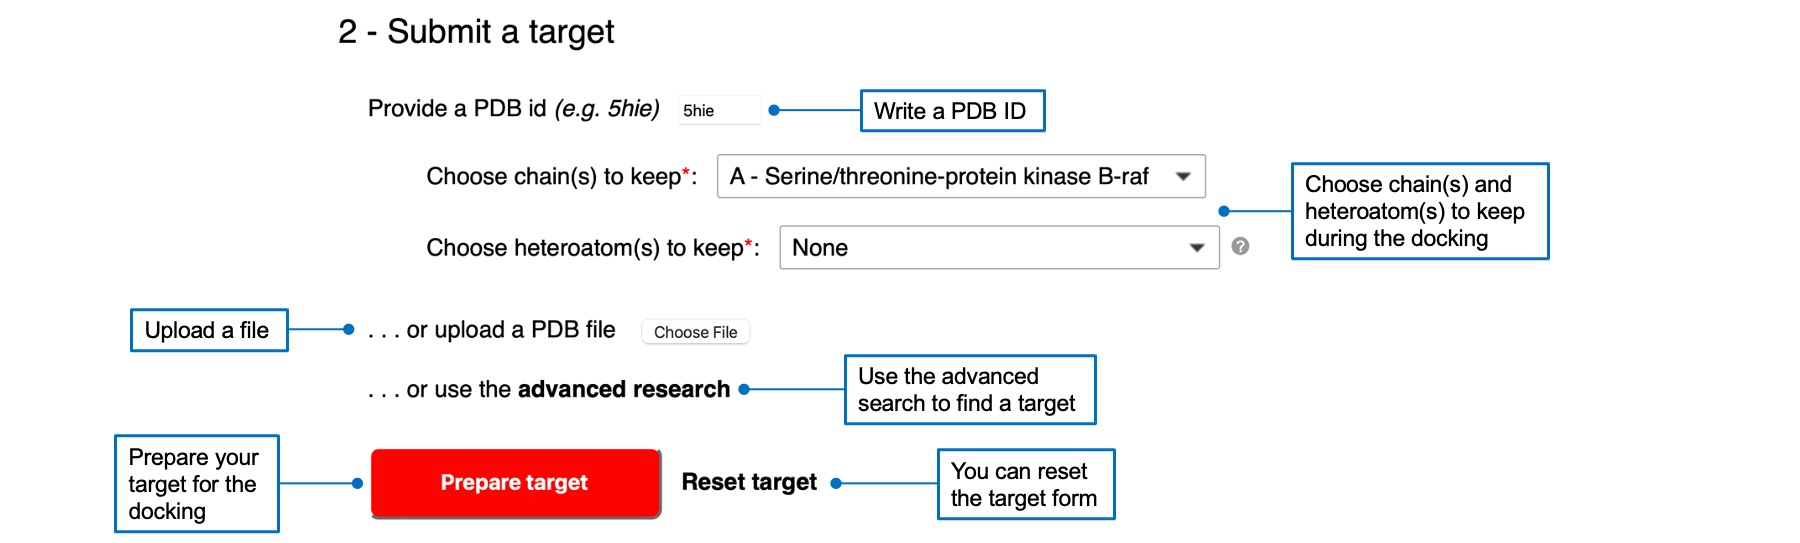
3 - Define search space
You need to define an orthorhombic search space in which the ligand will be docked. You can specify center and size values by using the boxes or by clicking on an atom in the 3D viewer. You can display several interactions using buttons below the viewer, as well as the protein surface.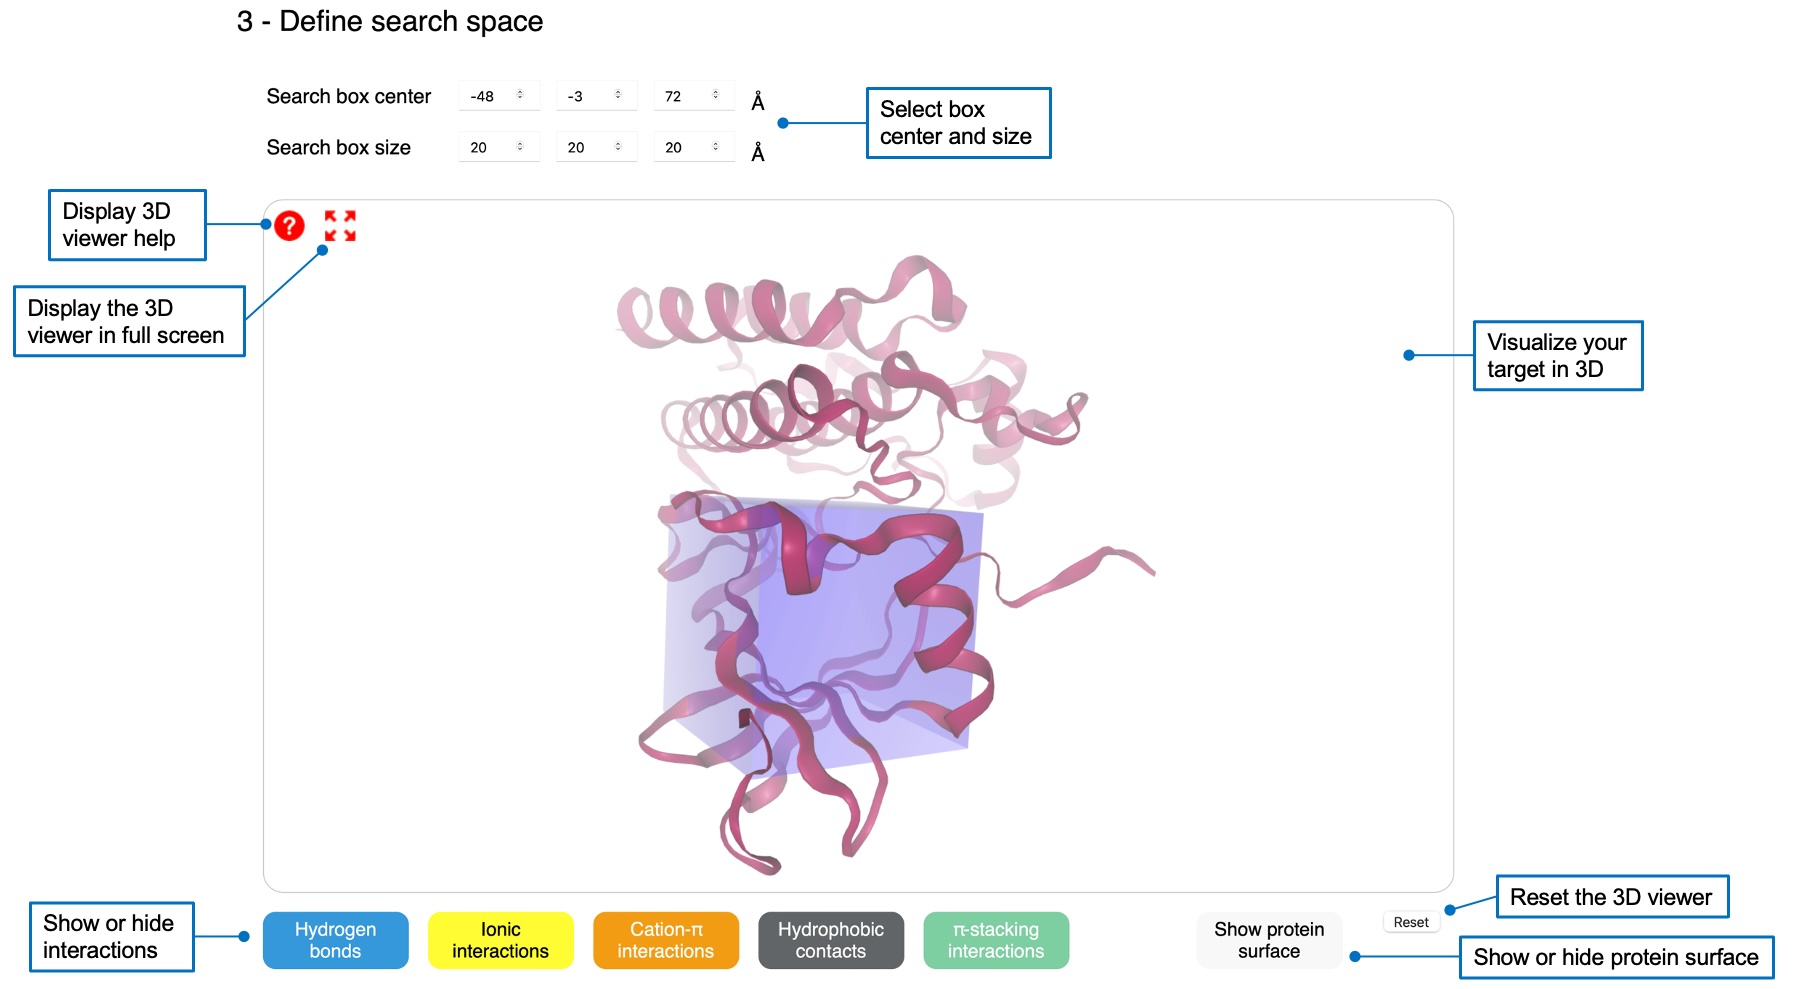
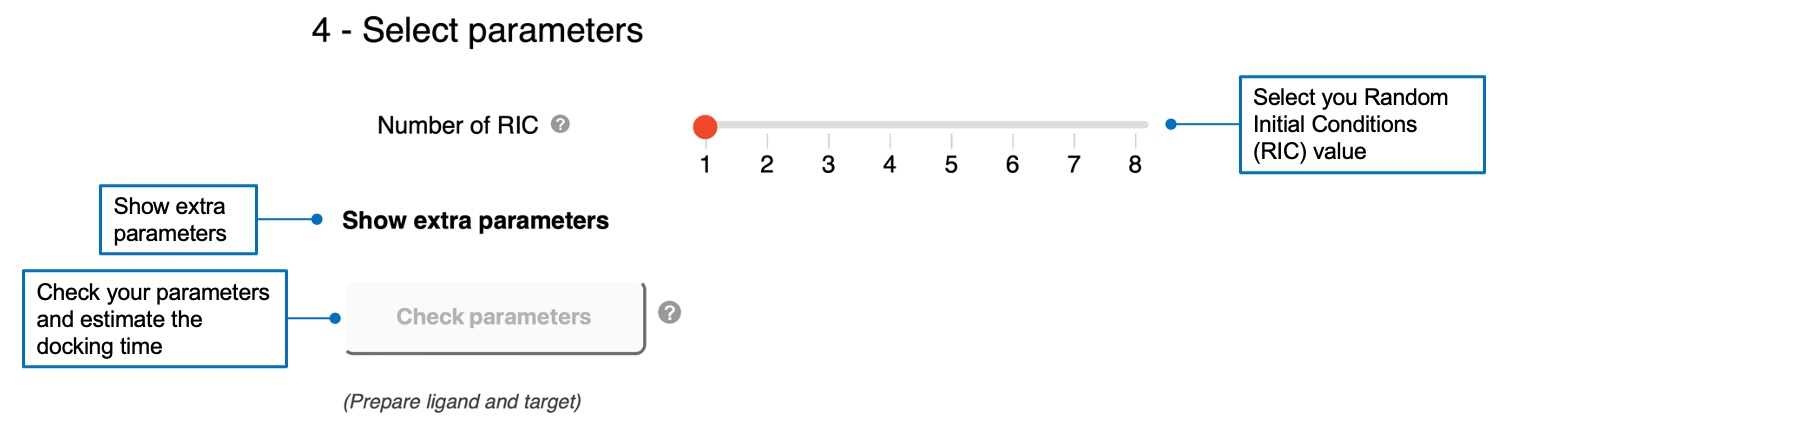
4 - Select parameters
For AC, you can specify the Random Initial Conditions (RIC) parameter, with a default value of 1. You can also show extra parameters and 1) define the sampling exhaustivity between low, medium (default), or high values, corresponding to 180°, 90°, and 60°, 2) define the cavity prioritization between buried (default), medium, or shallow values, corresponding to 70, 60, and 50. Please refer to the reference of AC 2.0 for definitions of these parameters.For Vina, you can define the sampling exhaustivity between 1 and 64, with a default value of 4.
Once you successfully prepared a ligand and a target and selected your parameters, you can click on the "Check parameters" button that will become red and active. This will check if your docking input is OK and estimate the calculation time. You can run your docking job if the computational time is less than 2 hours for AC, and 10 minutes for Vina. A check mark will appear if your job is autorized to run.
5 - Start docking
Before starting a docking job, you can enter an email address to receive a message at the end of the calculation. You can also specify a name to distinguish between dfferent jobs. Once you checked and validated your job, the "START DOCKING" button becomes red and active. You can click on it to start your job.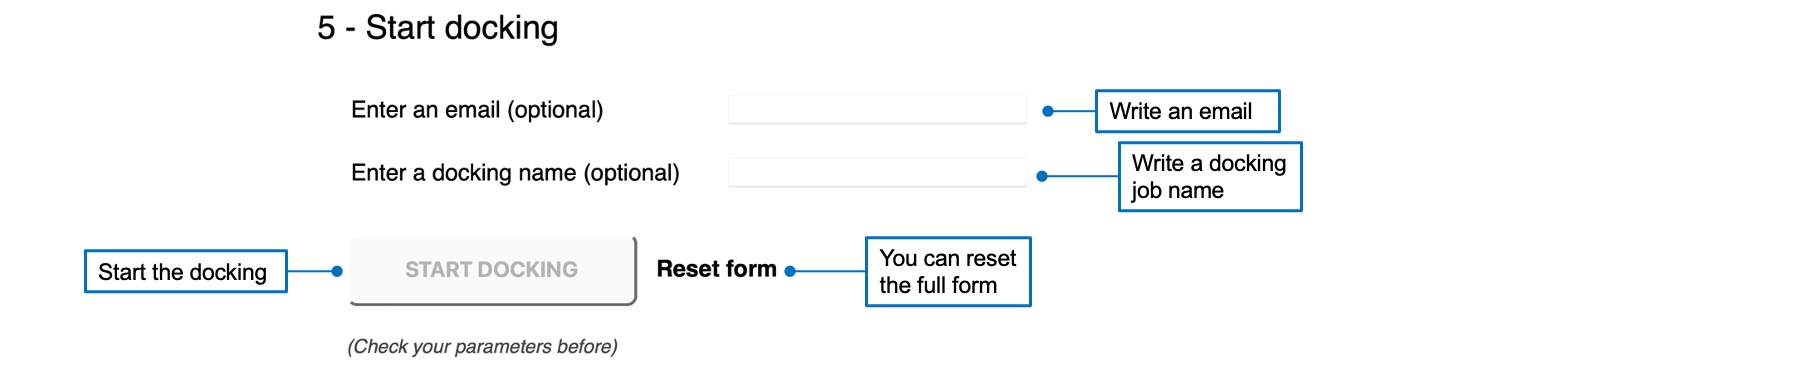
Docking
Once you started a docking job, you will be automatically redirected to a waiting page. Here, you can find the summary of your query, the estimated execution time, the status of the calculation, and a progress bar. You can click on the "STOP JOB" button if you want to cancel your docking job. If you provided an email address you can close the page, otherwise you should leave it open or bookmark the results link provided. The page is automatically refreshed to inform you of the status of your job.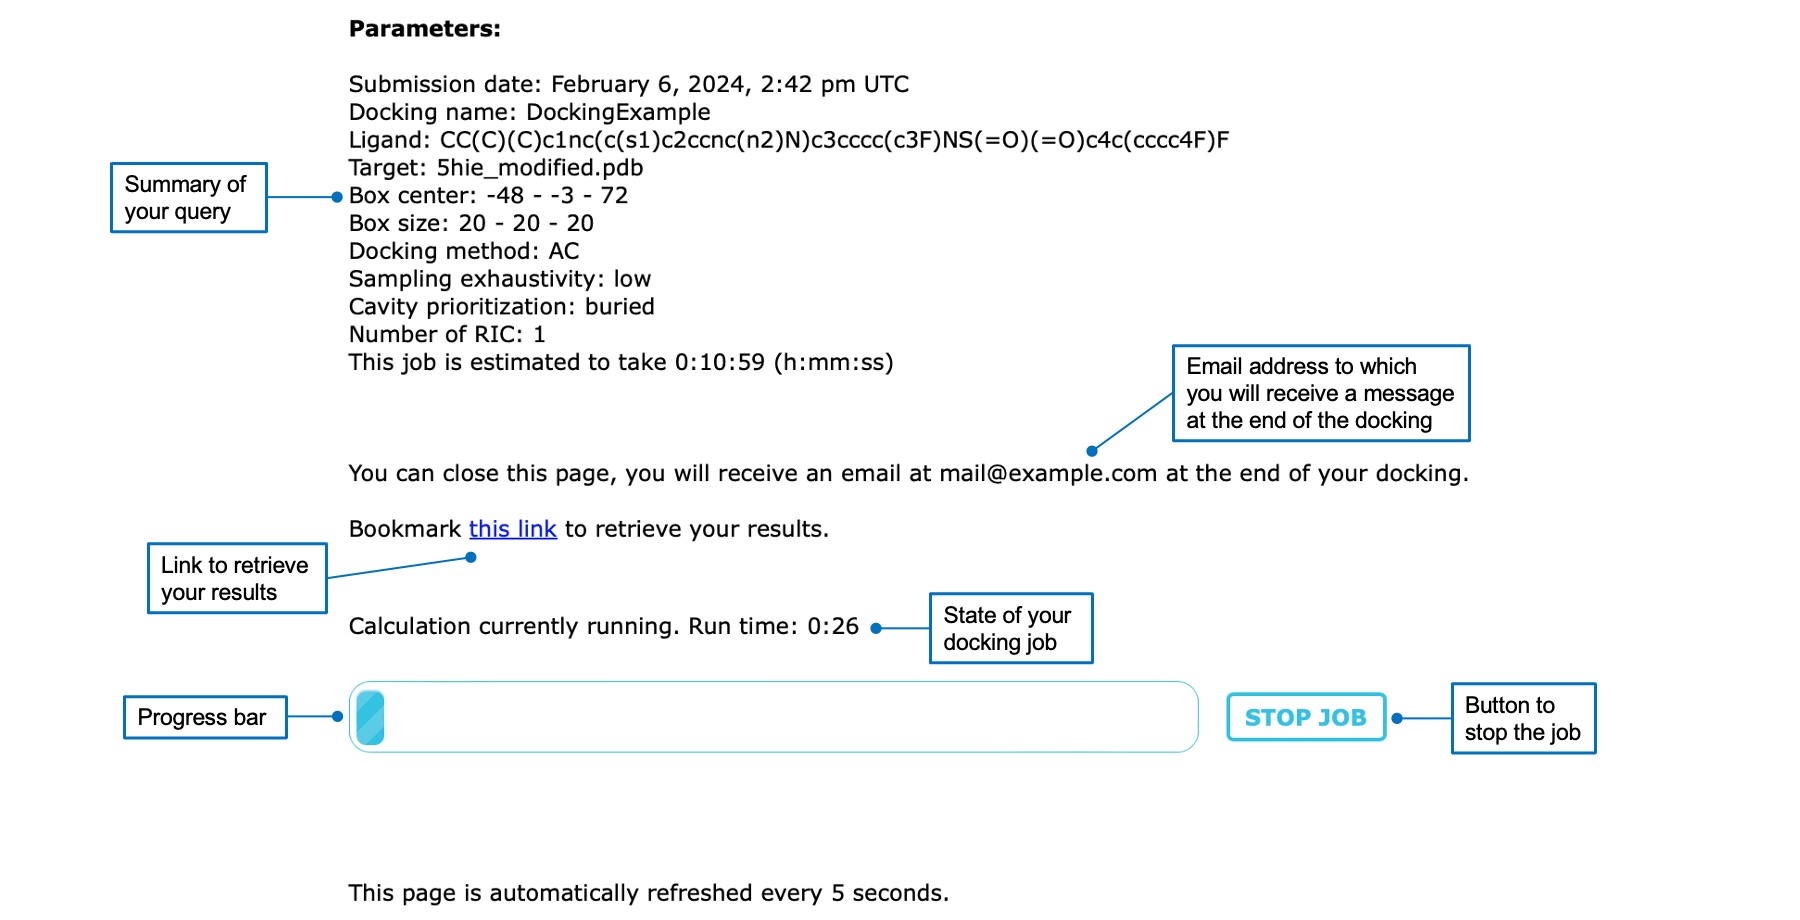
Results
Once the docking job is finished, you are automatically redirected to the results page. At the top you will find a summary of your query and the 2D representation of your ligand, which you can send to other SwissDrugDesign tools using the interoperability icons. You can also retreive the SMILES notation of the ligand.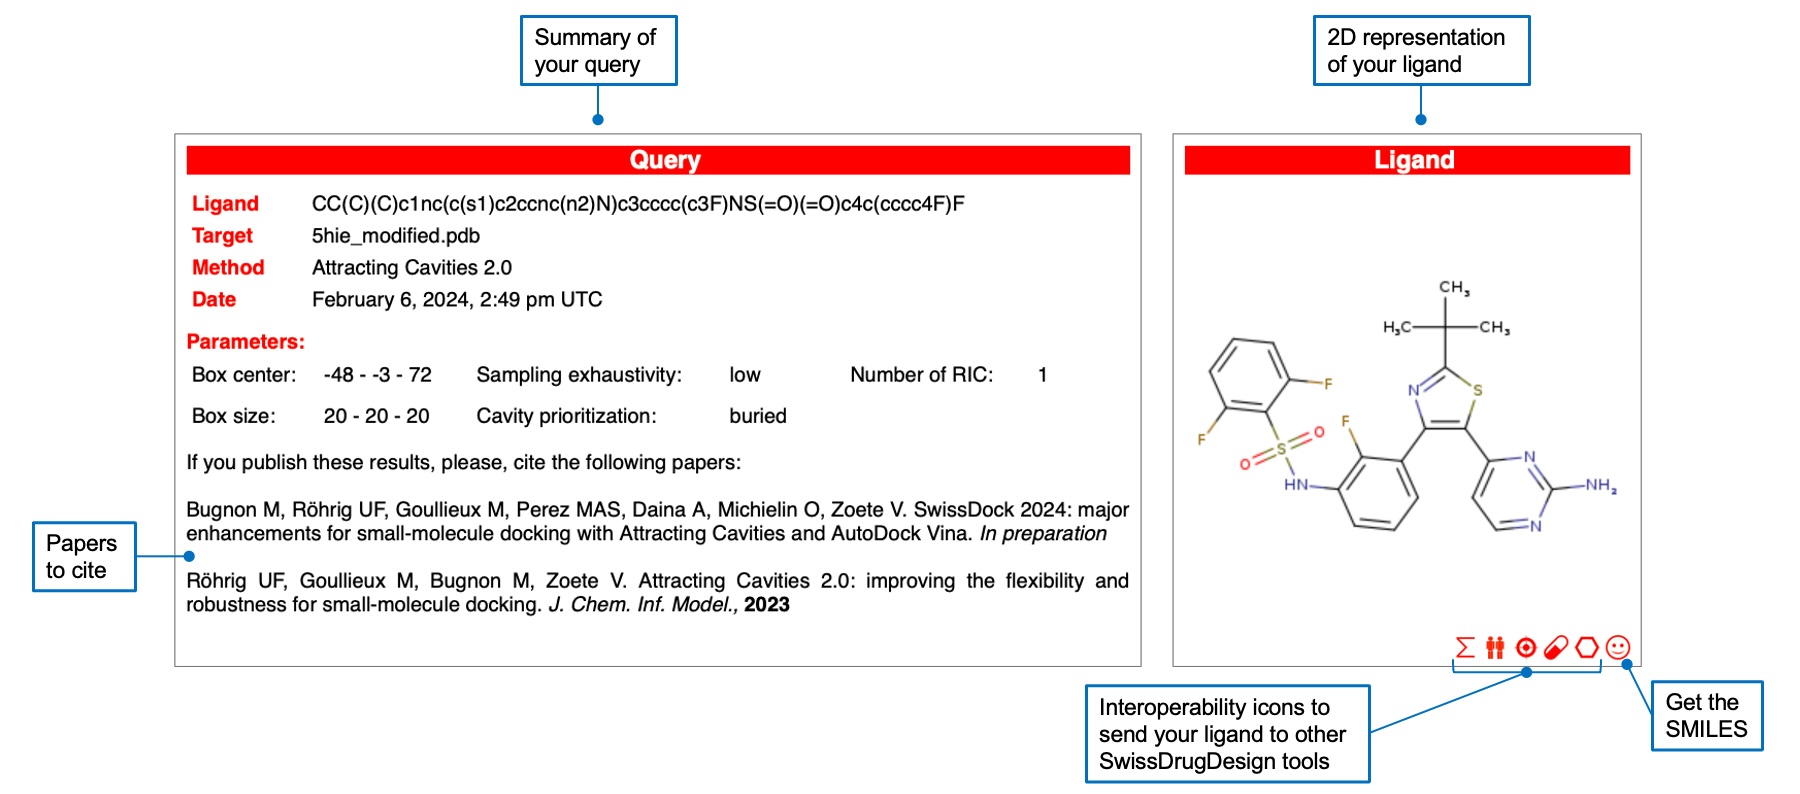
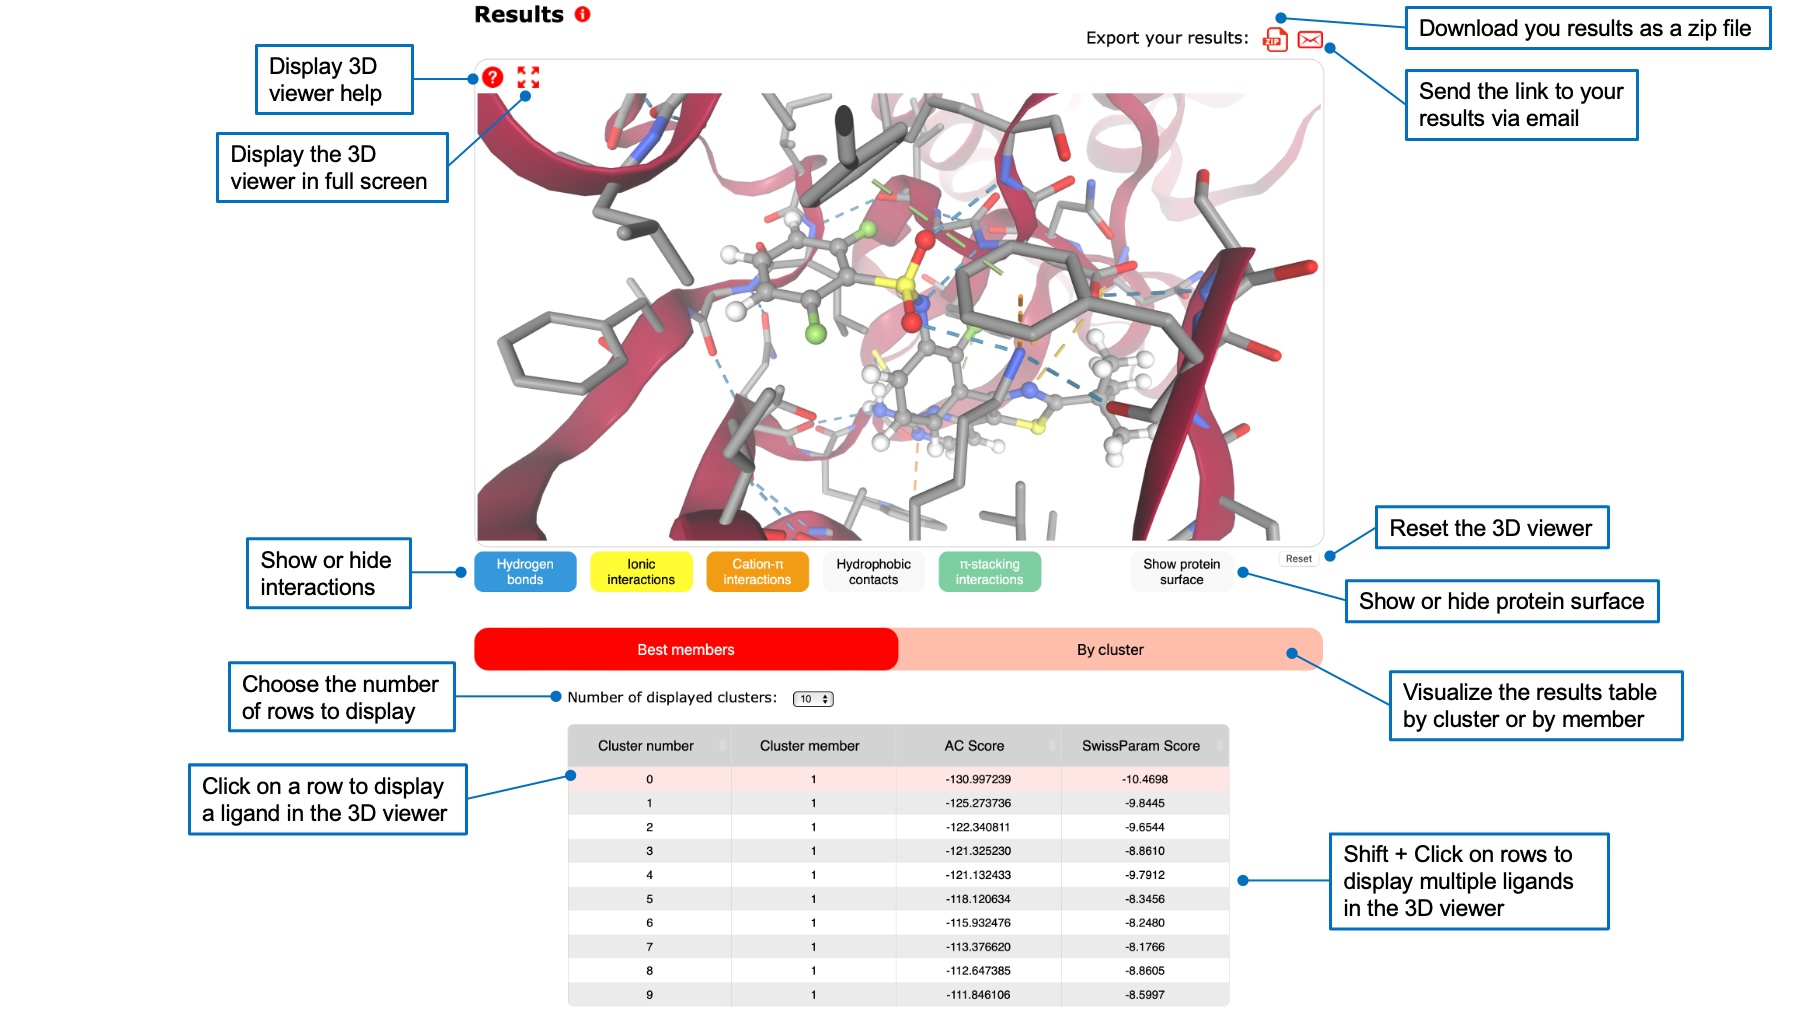
Below the query and ligand boxes, you will find a 3D viewer displaying your target and the calculated ligand poses. Above the 3D viewer, icons allow to download your results as a zip file or to send a link to this page by email. Below the 3D viewer, a table containing ligand poses ranked by their score is displayed.
For AC, you can rank poses by their AC score or by their SwissParam score by clicking on the respective header. Check the FAQ to understand the difference between the tow scores. You can also display a table showing best members of each cluster, or a table for each cluster.
You can click on a row of the table to visualize the corresponding ligand pose in the 3D viewer. Its 3D structure will appear, and a zomm will show interactions between the pose and the target. You can choose to show different interactions by clicking on interaction buttons below the viewer. You can also display the protein surface. It is possible to visualize multiple ligand poses by holding shift and clicking on several rows.
Other information
If you need help with the command-line, you can find documentation here.If you need more help on the web interface, please have a look at the tutorial videos here.
Answers to frequently asked questions can be found in the FAQ page,here.